You have a finished transcript and you want it in a second language. The standard advice is to sign up for a translation API, generate a key, paste it into some tool, and pay per character. It works, but it means an account, a billing relationship, and sending every line of your transcript to a third party.
A local translation model removes all of that. This guide covers how it works, what it costs you in disk and memory, where the quality lands, and how to actually do it.
Why not just use machine translation online?
Three reasons, in the order people usually run into them.
The bill is unpredictable. Per-character pricing looks trivial until you translate a back catalogue. A 40-minute talk is roughly 6,000 words; twelve of them into four languages each is not a rounding error any more.
The transcript is the recording. If the audio was sensitive enough that you transcribed it locally, sending the text to a translation API undoes that decision entirely. The transcript contains every sensitive sentence, in a format that is easier to search than the audio ever was.
It stops working when the network does. Editing subtitles on a train or a plane is exactly when you have time for it, and exactly when an API-based tool is useless.
How local translation works
The model is a file you download once — a quantised translation model of about 1 to 2 GB. It sits on your disk. When you ask for a translation, the app loads it into memory, feeds each subtitle line through it, and writes the result back. Nothing leaves the machine and there is no request to bill.
TranscribeKit uses Hy-MT2, a model built specifically for translation rather than a general-purpose chatbot. That distinction matters: a translation-specific model of this size beats a general model of the same size at this task, and it will not wander off and start explaining the sentence instead of translating it.
The model is not bundled with the app. A 1 GB download inside an installer would be unreasonable, so you choose and download it from inside the app when you first need it. Nothing is fetched without you asking.
Step 1 — Download a translation model
Open Settings. Under Offline Subtitle Translation you will find three sizes of the same model. They differ only in how heavily they are compressed:
| Quant | Size on disk | Quality | Best for |
|---|---|---|---|
| Q4_K_M | ~1.06 GB | Good | Laptops, 8 GB RAM, limited disk |
| Q6_K | ~1.37 GB | Better | The sensible default on most machines |
| Q8_0 | ~1.78 GB | Best | Desktops with RAM and disk to spare |
The differences are real but not dramatic. Q4_K_M produces perfectly usable subtitles; Q8_0 handles idiom and long sentences slightly more gracefully. If you are undecided and have the space, take Q6_K.
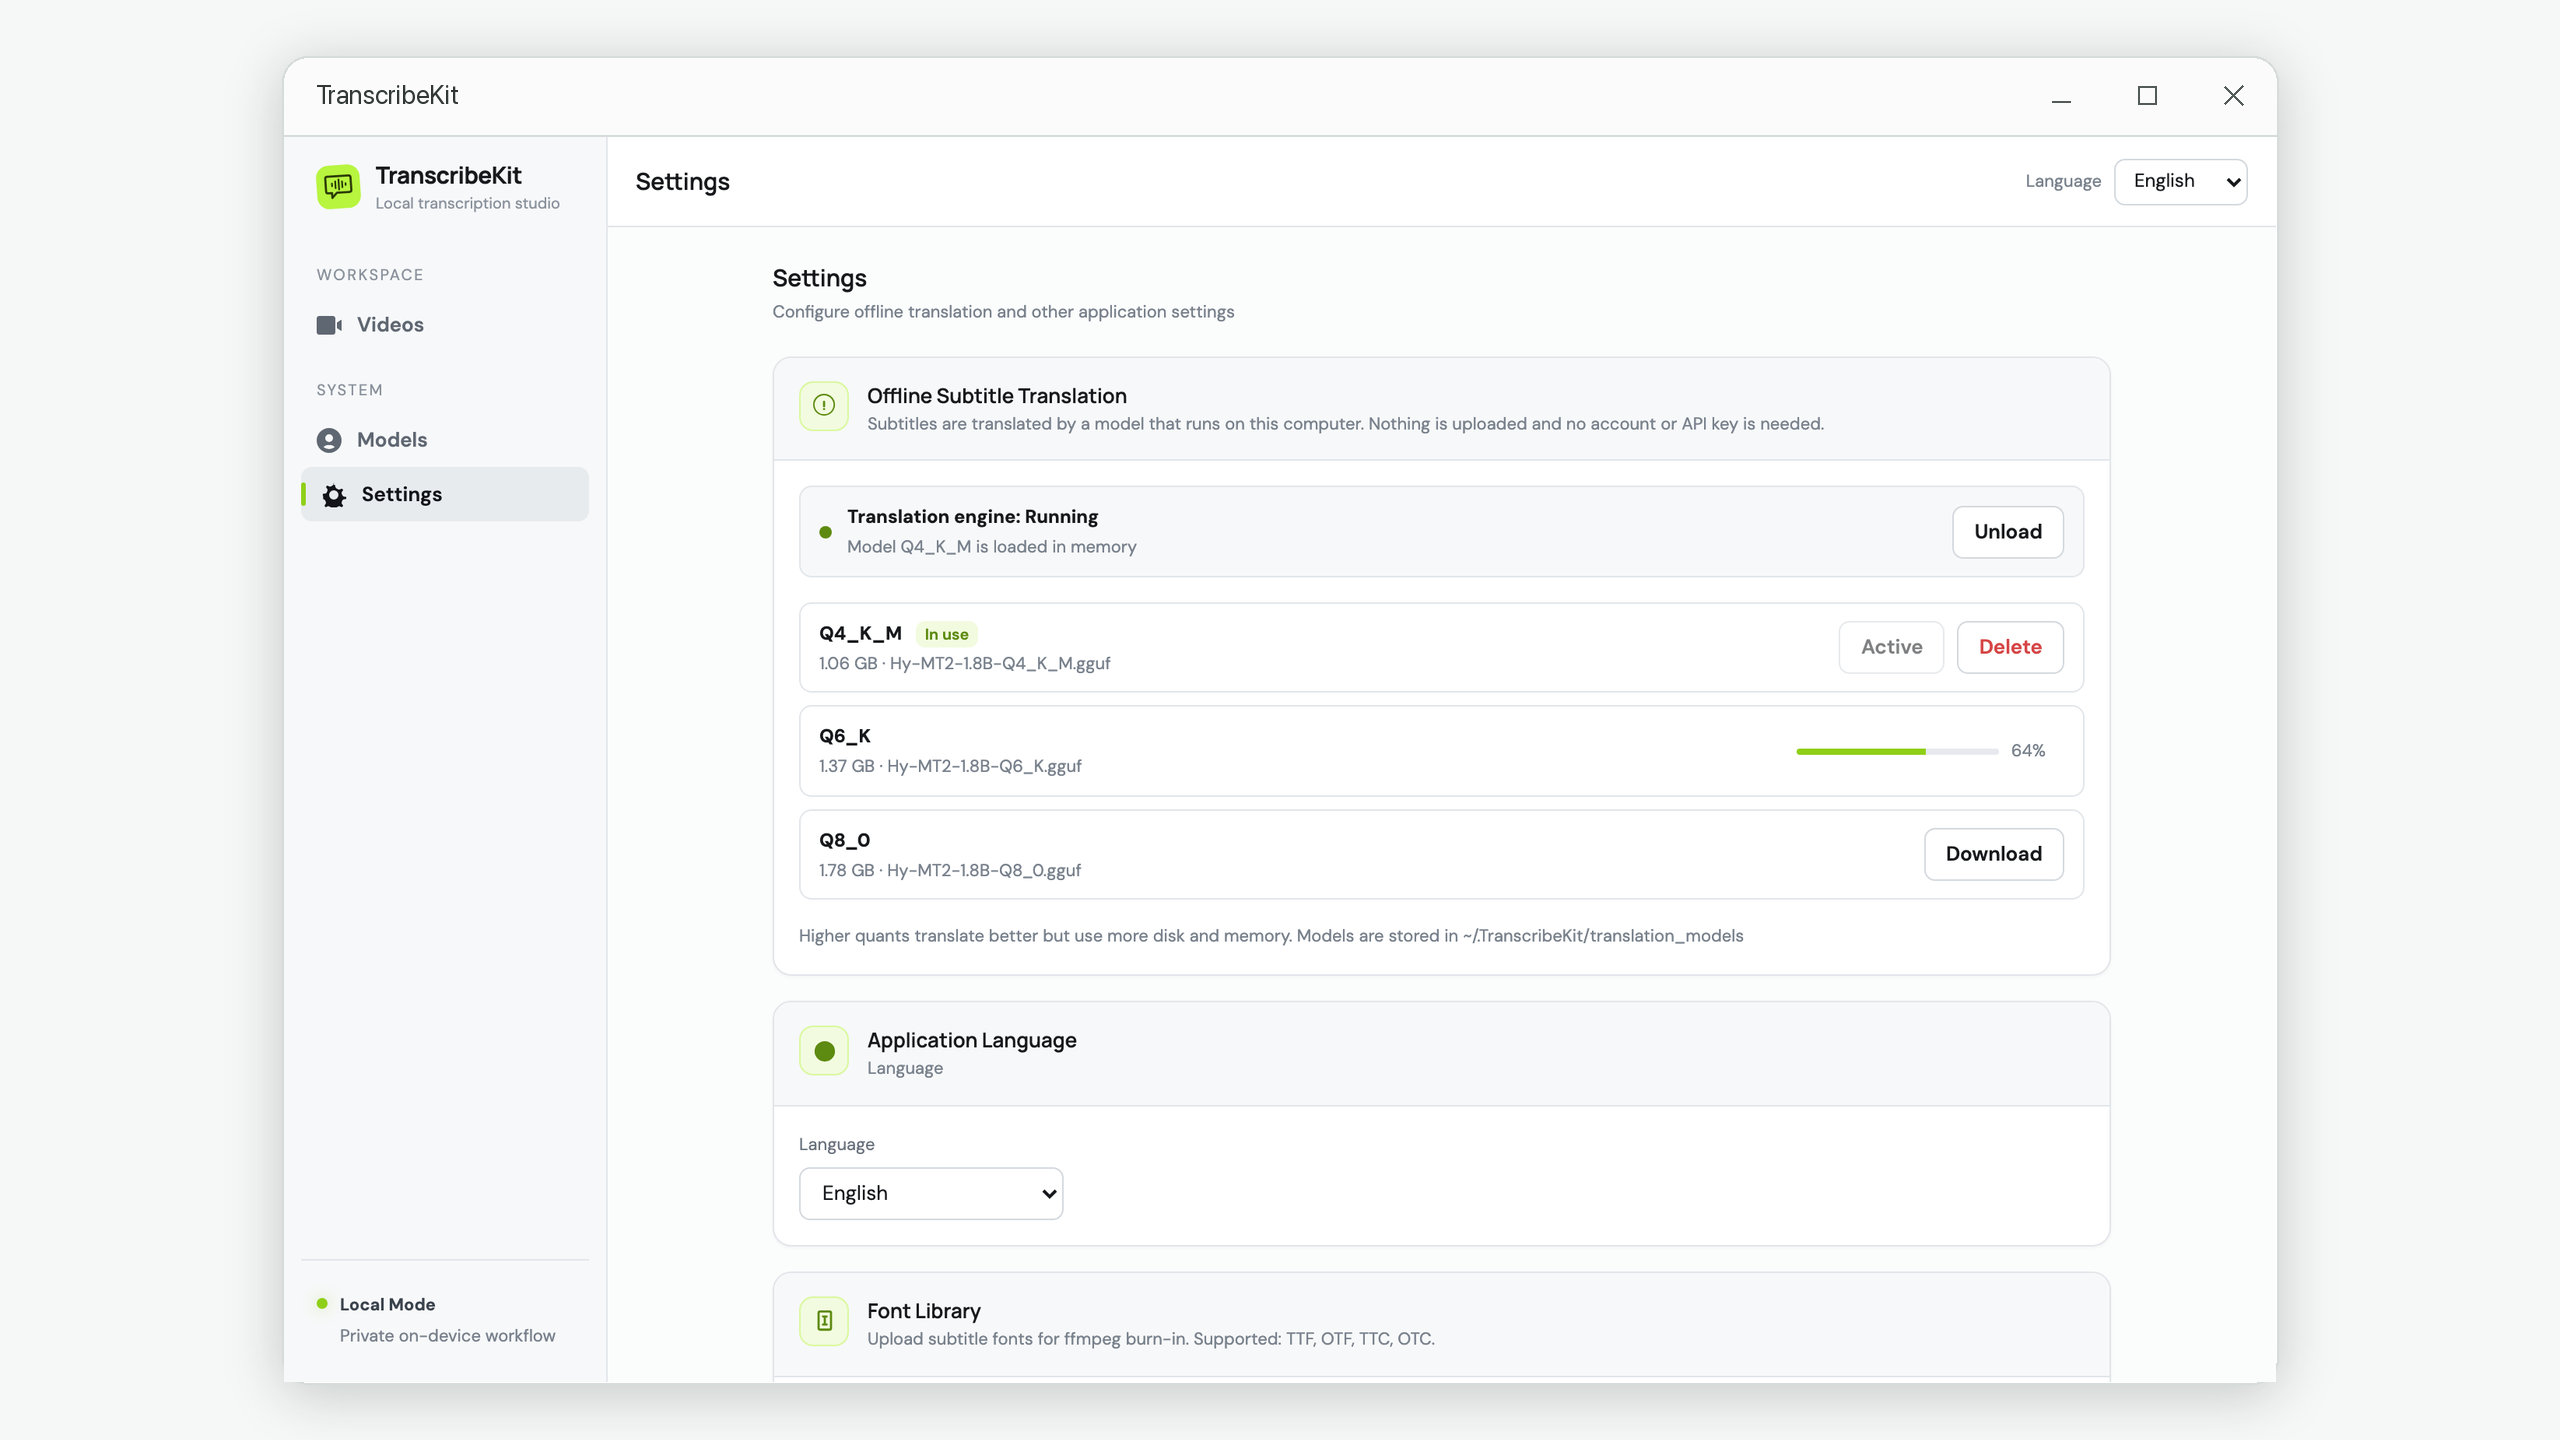
Downloads resume if they are interrupted, so a dropped connection halfway through does not mean starting over.
Step 2 — Translate the subtitles
Open a video that already has a completed transcript and go to the Translate step.
- Click Add language and choose your target from the 20 available.
- Translation starts immediately and runs line by line. Progress is shown per language.
- When it finishes, the side-by-side view shows the original and the translation together.
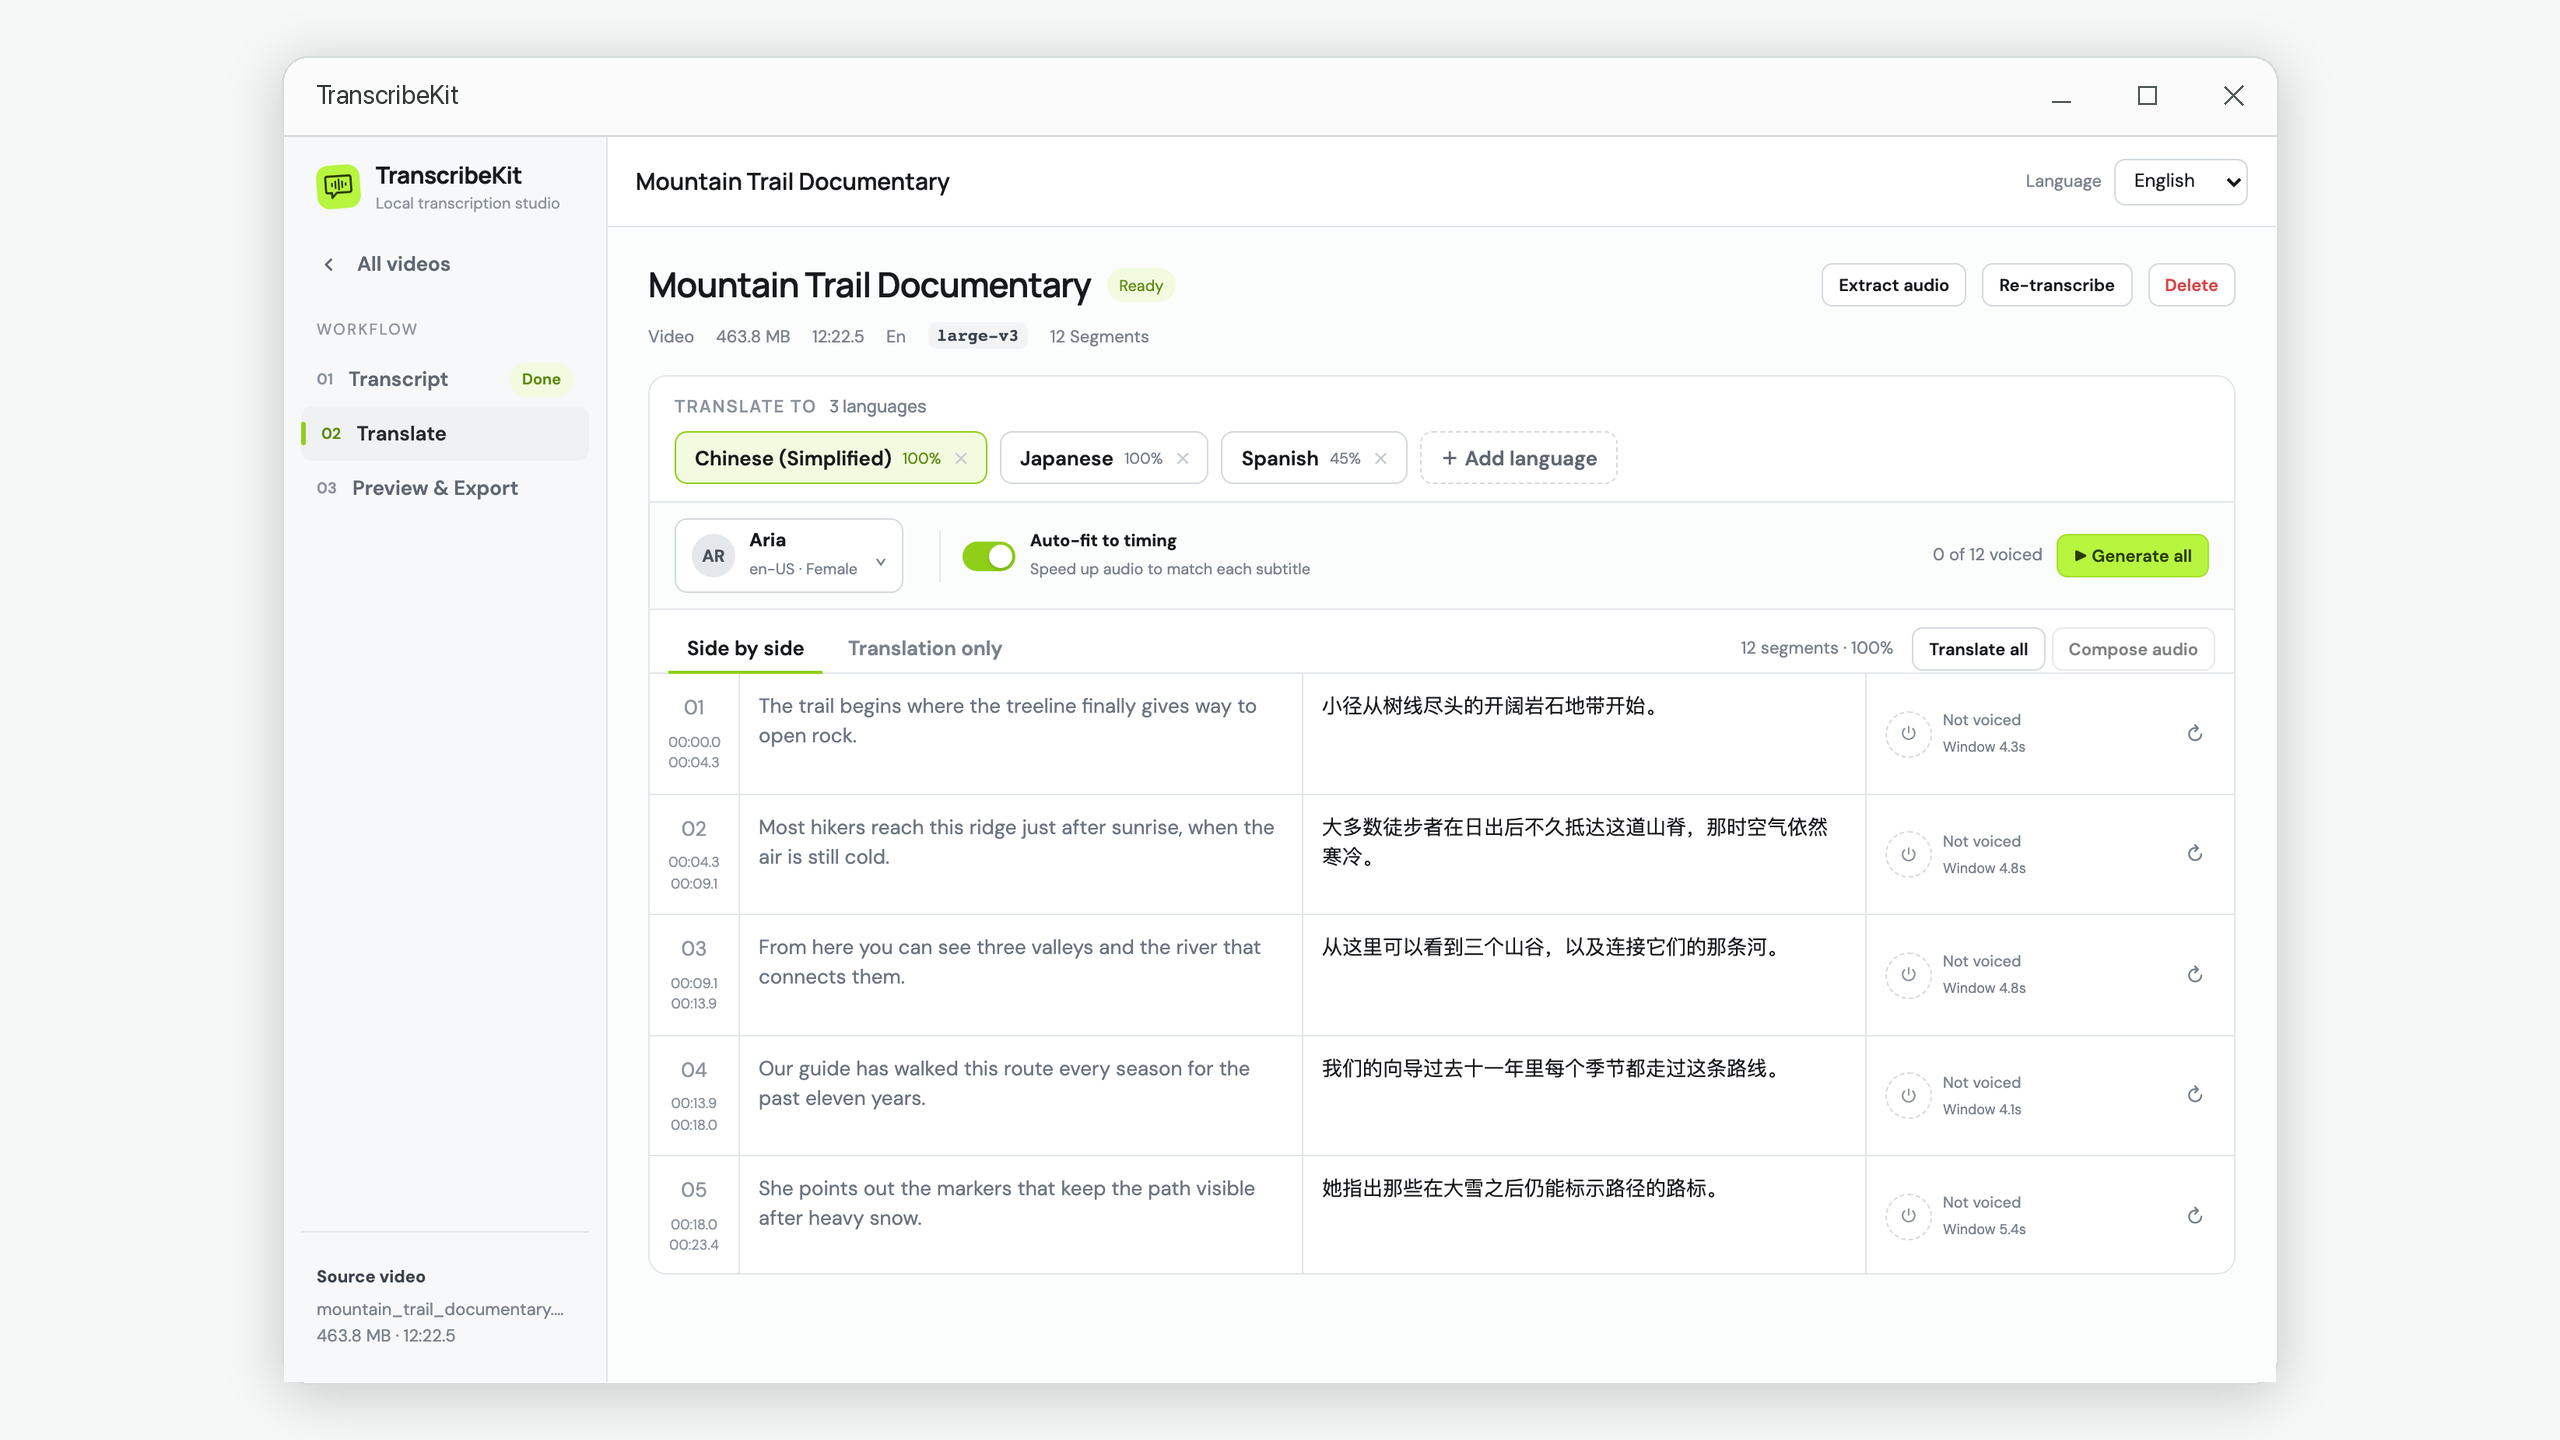
Two things worth knowing about how this runs:
- One line at a time, in order. Slower than a batched cloud API, but each subtitle is translated in isolation, so a mistake never cascades into the following lines.
- Progress is saved as it goes. If it is interrupted — you close the app, the engine is stopped — the finished lines are kept and retrying resumes from where it stopped rather than starting over.
Step 3 — Review the output
Machine translation of subtitles has predictable failure modes. Skim for these rather than reading everything:
- Names and products that got translated when they should have been left alone.
- Idioms rendered literally. These are usually obvious and usually funny.
- Length. German and Spanish translations often run 30% longer than the English. A line that fitted comfortably may now be too long to read in the time available.
- Formal vs informal address in languages that distinguish them. The model picks one; it may not be the one you want.
Every translated line is editable in place, exactly like the original transcript.
Step 4 — Export or burn in
From the Preview & Export step, the track selector lets you export any language as SRT, VTT, TXT, JSON or TSV. You can also burn the translated track into the video, or burn two tracks at once — original above, translation below — which works well for language learning content.
Managing memory
The model stays loaded between translations so it does not have to be read from disk every time. That costs 1 to 2 GB of RAM while it is resident.
If you need that memory back — you are about to render video, or run something else demanding — use Unload in Settings. The next translation will reload it automatically, taking a few extra seconds. The engine also stops when you close the app, so nothing is left running in the background.
When a cloud translator is still the better choice
Being straight about the limits:
- Rare language pairs. The 20 supported languages cover most needs, but if yours is not among them, a large cloud service will have it.
- Publication-grade literary translation. For marketing copy where tone carries the message, a human translator beats any model, local or hosted.
- Very large volumes on a deadline. A server GPU is simply faster. If you have thousands of subtitles due tomorrow, that matters.
For everything else — a course, a documentary, a product video, an interview — a local model gets you a solid draft you then edit, at no cost per word and with no material leaving your computer.
Translate captions with no account and no API key
TranscribeKit translates subtitles into 20 languages using a model on your own machine. Download it once and it works offline.
Get it from the Microsoft Store