Adding subtitles sounds like one task. It is really four, and most of the frustration people hit comes from not separating them: transcribe, correct, format, deliver. Getting the first one right makes the other three quick. Getting it wrong makes all of them miserable.
This walkthrough uses TranscribeKit on Windows, but the stages and most of the advice apply whatever tool you use.
Before you start: the recording decides everything
Speech recognition accuracy is dominated by the audio, not the software. Ten minutes of attention here saves an hour of correction later.
- One speaker at a time. Overlapping speech is where every model, cloud or local, degrades hardest.
- Consistent volume. A speaker who drifts away from the microphone produces gaps and invented words.
- Background music is worse than background noise. Steady hiss is largely ignored; music with vocals gets transcribed as if it were speech.
- If you have the original audio, use it. Feed the app the source file rather than a heavily compressed export.
If the recording is already made and it is poor, that is fine — just expect to spend more time in the editing stage, and pick a larger model (covered below).
Stage 1 — Transcribe
Add the video to the app. TranscribeKit takes MP4, MOV, MKV, WebM and AVI for video, and MP3, WAV, M4A, FLAC and others for audio-only. There is no project to create and nothing to name; the title comes from the filename and you can rename it later.
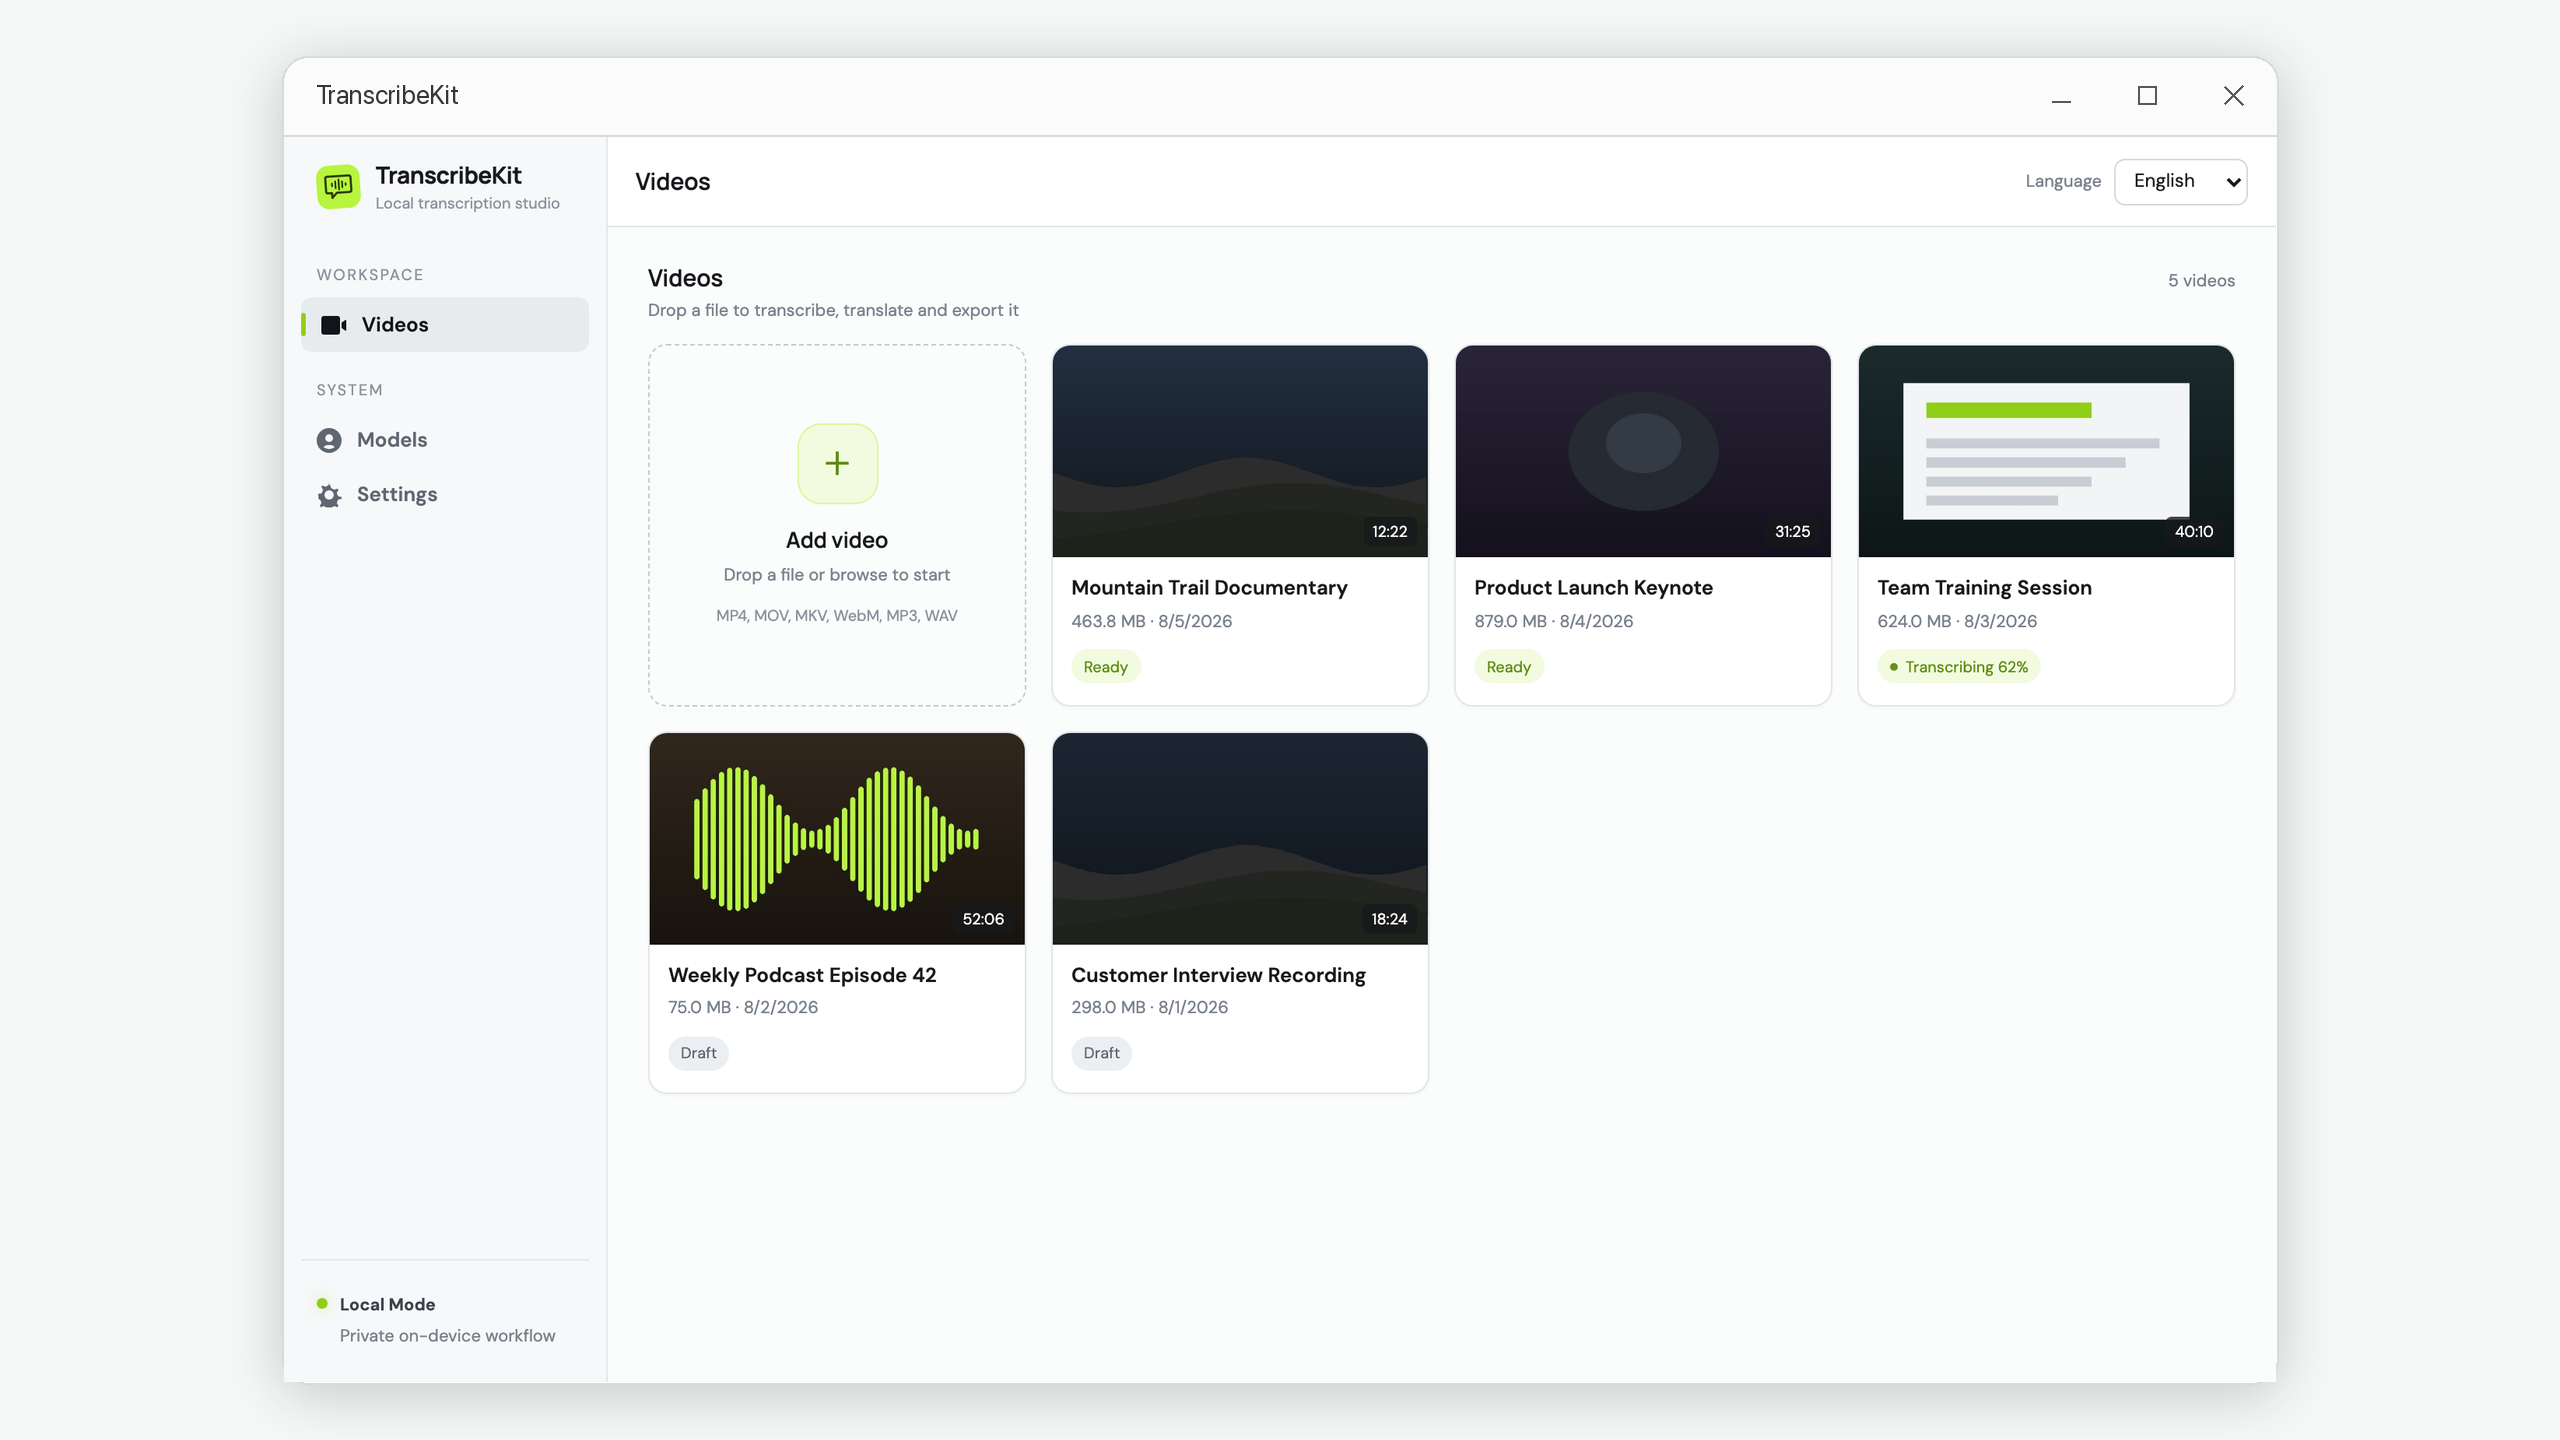
Then pick a model and start. The short version of model choice: base for a quick draft of clear speech, large-v3 when accuracy matters more than time. If you are unsure, start with base — you will find out within a minute whether the audio is clean enough for it.
You do not need to specify the spoken language. It is detected from the first part of the audio.
Expect this to take a while. Transcription runs on your CPU, so a one-hour recording is minutes, not seconds. It runs in the background and you can leave the app while it works.
Stage 2 — Correct what actually matters
Here is where people waste the most time: trying to make the transcript perfect. Do not. Fix the things that break the viewer's understanding and leave the rest.
In practice, that means four categories:
- Names. People, companies, products. A model has never heard your colleague's surname and will guess something plausible. These are the errors that look worst.
- Technical terms and acronyms. Domain vocabulary is the second most common failure.
- Numbers that carry meaning. Prices, dates, versions, dosages.
- Sentence-breaking punctuation. A missing full stop that merges two ideas is worth fixing; a debatable comma is not.
Everything else — a slightly wrong filler word, "gonna" versus "going to" — costs you time and gains the viewer nothing.
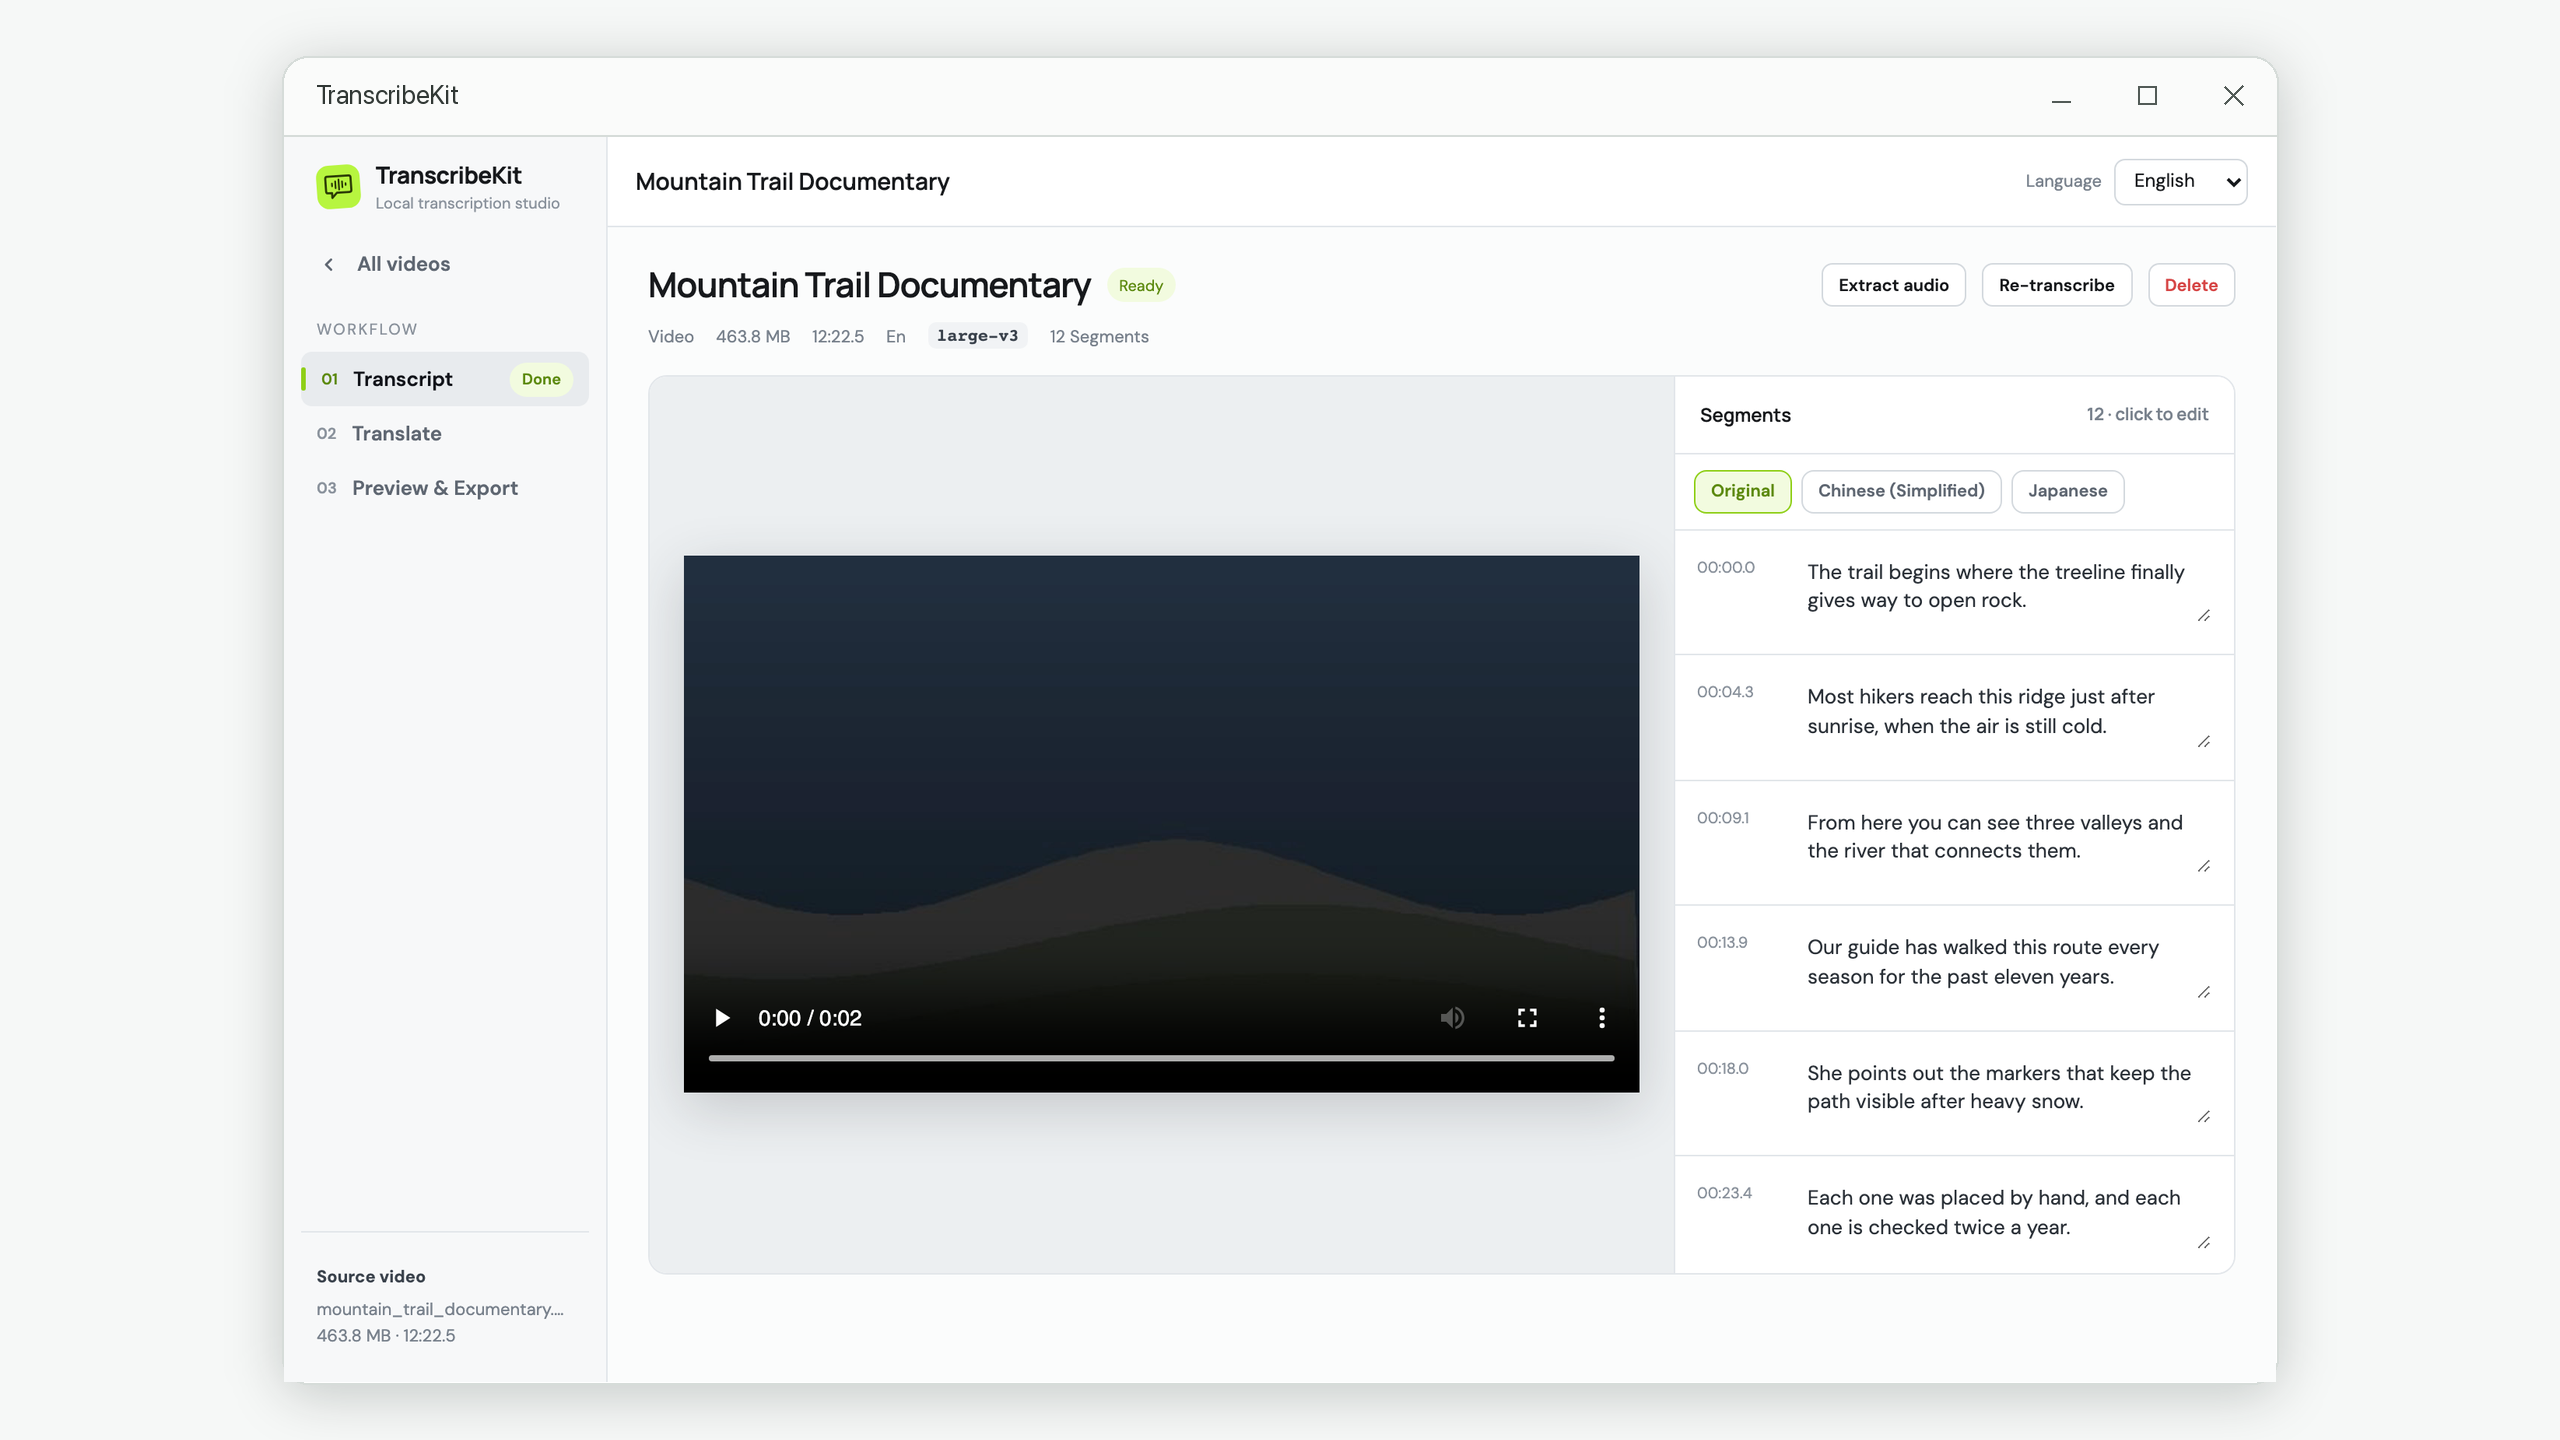
Work with the video playing alongside. Reading the transcript on its own, you will accept lines that make no sense against what is actually being said.
Stage 3 — Decide: subtitle file or burned in?
This is a real fork, and picking wrong means redoing the delivery stage.
| Subtitle file (SRT/VTT) | Burned in | |
|---|---|---|
| Viewer can turn it off | Yes | No |
| Searchable / indexed by platforms | Yes | No |
| Editable after delivery | Yes, it is a text file | No, requires re-rendering |
| Survives re-uploads and downloads | No, easily lost | Yes, part of the picture |
| Autoplay-muted feeds | Often not shown | Always visible |
| You control the exact look | No, the player decides | Yes |
The practical rule: YouTube, Vimeo, a course platform, or anywhere with a real player — use a subtitle file. It is smaller, editable, better for SEO, and accessible. Instagram, TikTok, LinkedIn, X, or an embedded autoplay clip — burn them in, because those feeds play muted and frequently strip or ignore subtitle tracks.
Exporting a subtitle file
Five formats are available and they are not interchangeable:
- SRT — the universal default. Use this unless you have a reason not to.
- VTT — for HTML5 web players. Required by the
<track>element. - TXT — plain text with no timings, for show notes, articles or a quick read-through.
- JSON — structured segments with timings, if you are feeding another tool.
- TSV — tab-separated, for spreadsheets and data work.
Burning captions in
Burning renders the text permanently into the video frames. The settings that actually affect legibility, in order of impact:
- Size. Judge it against the smallest screen your audience uses, which is a phone. If it looks slightly too large on your monitor, it is about right.
- Outline or shadow. Non-negotiable. White text over a bright scene is invisible without it.
- Position. Keep captions clear of the bottom edge — social platforms overlay usernames and buttons there.
- Font. A plain sans-serif at a heavier weight. Decorative fonts fail at small sizes.
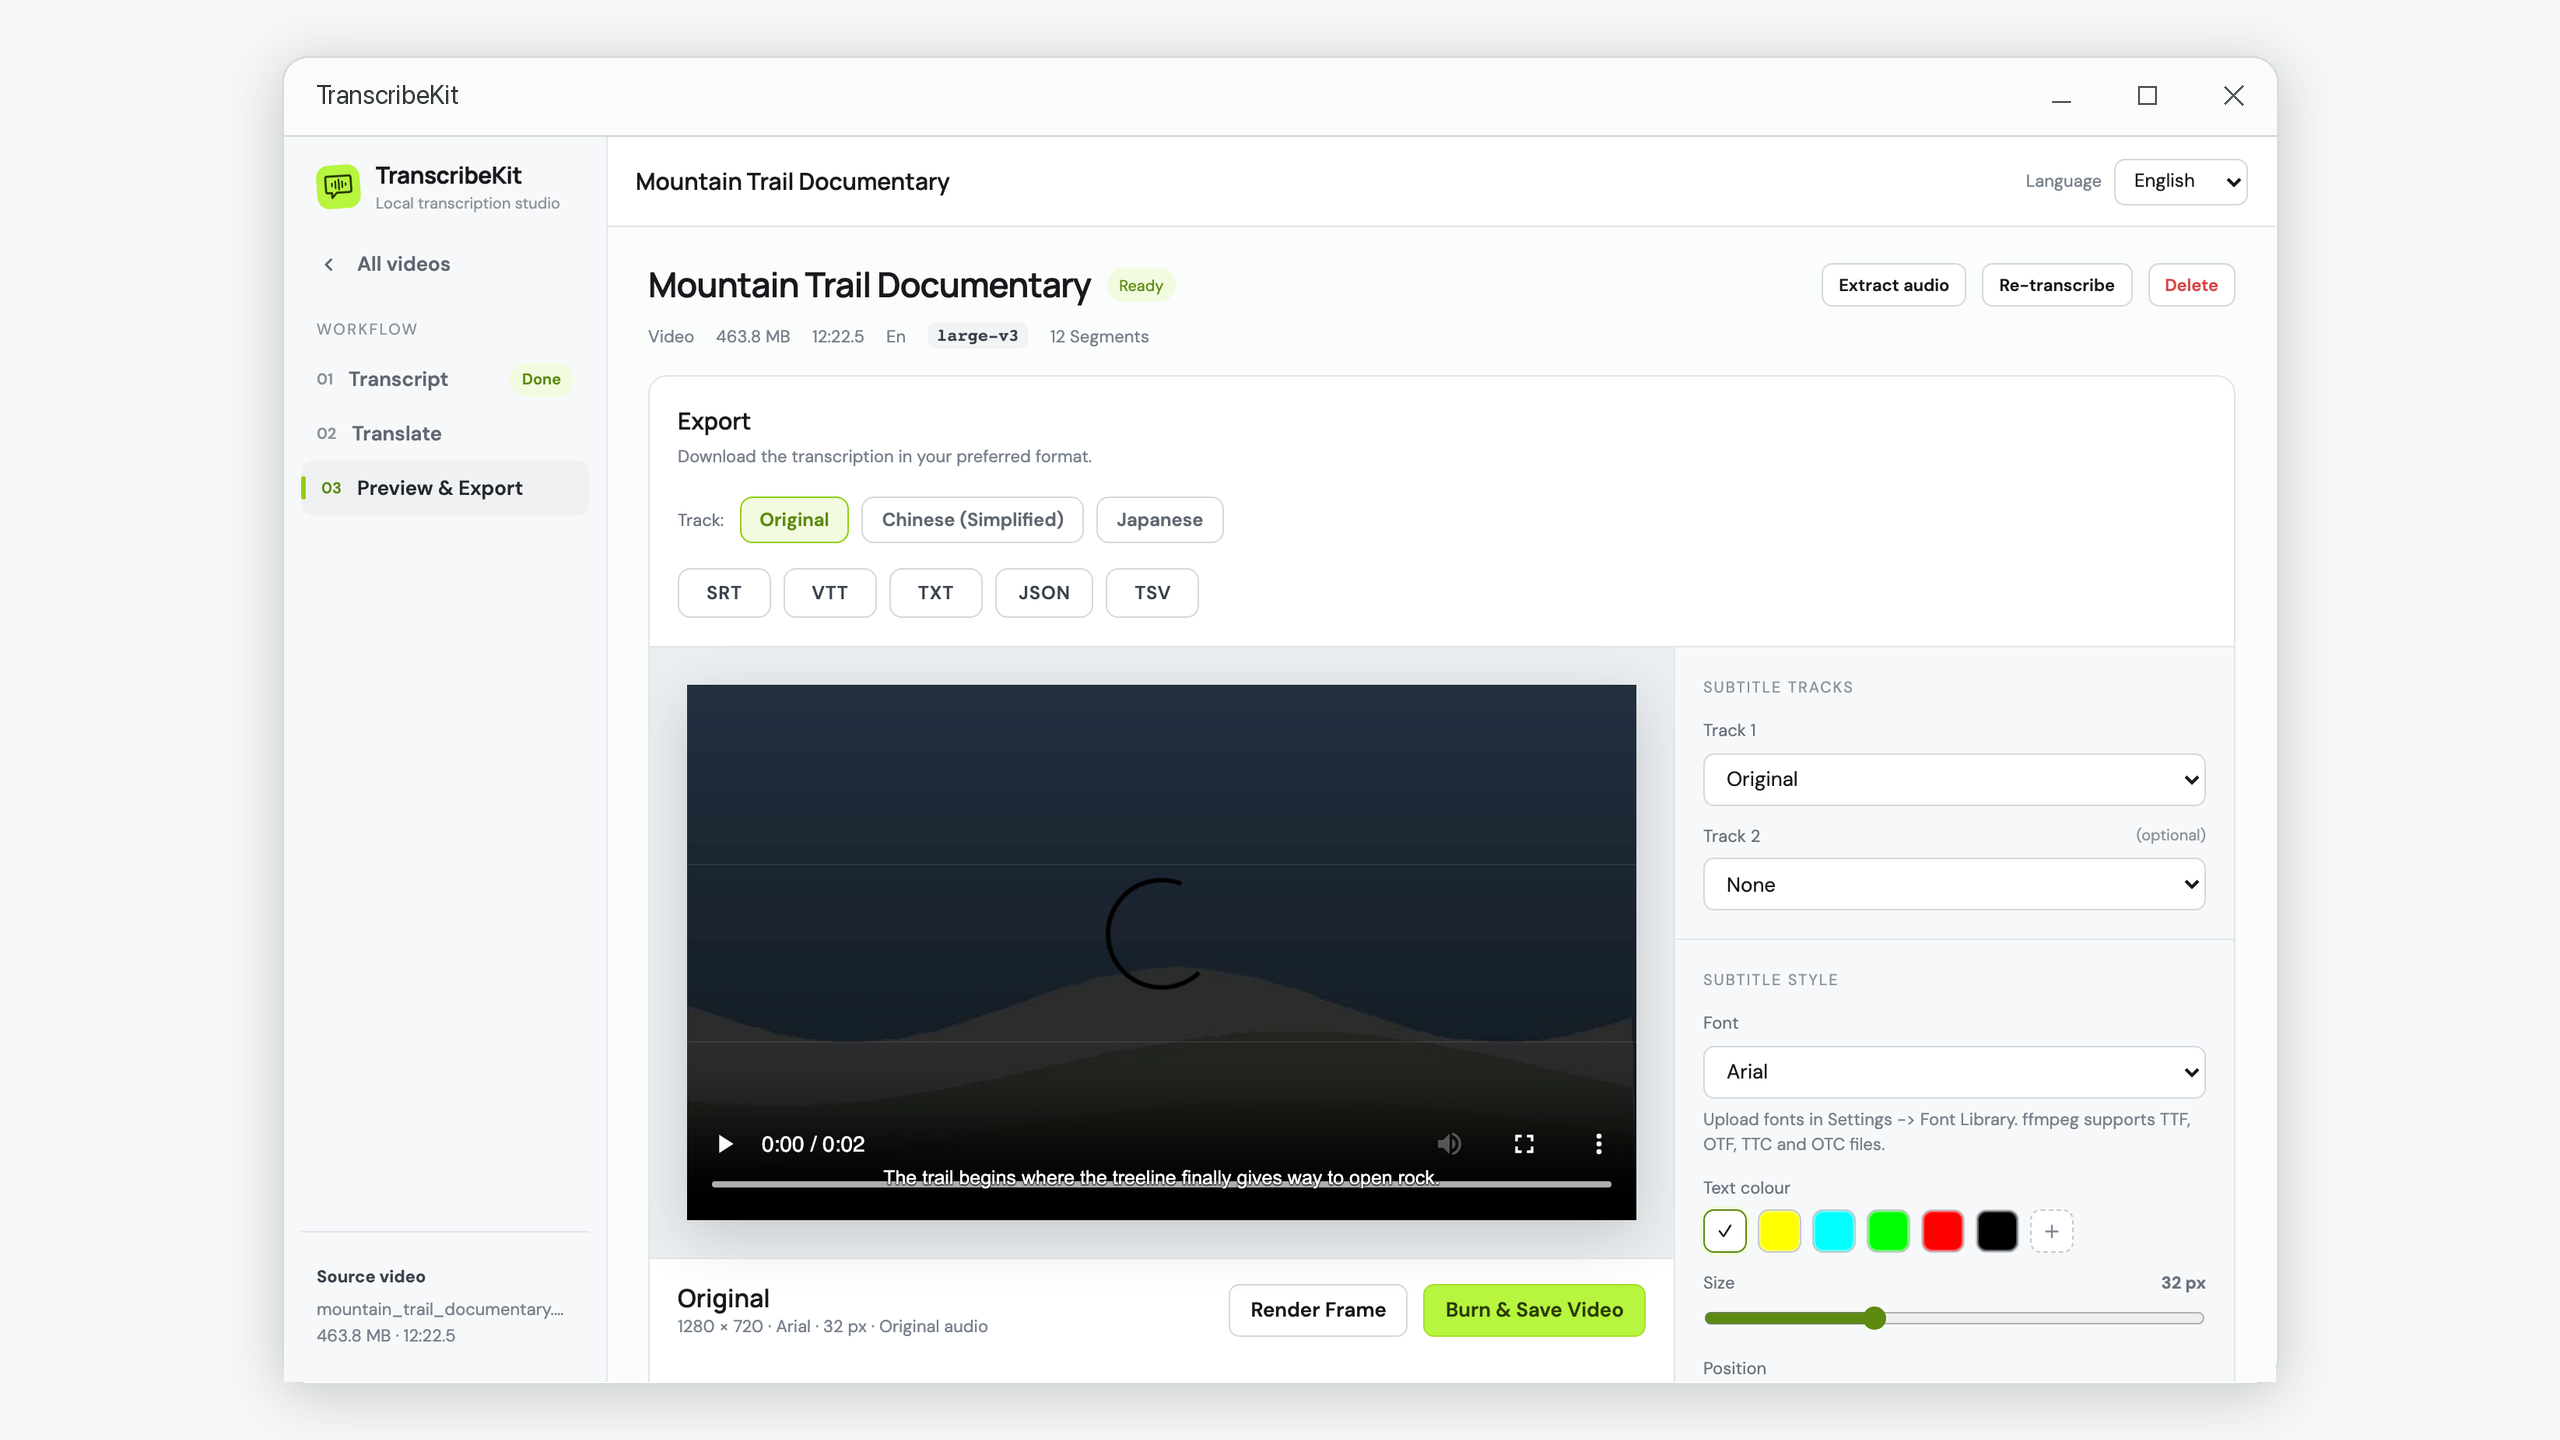
Always render a single preview frame before committing to the full video. Burning a one-hour video takes minutes; discovering afterwards that the font was too small costs you all of them again.
Stage 4 — Deliver
A few things that consistently go wrong at the last step:
- Upload the subtitle file after the video finishes processing, not during. Some platforms silently drop it otherwise.
- Check the language tag the platform assigns. An English transcript labelled as another language will not surface in search.
- Keep the SRT. When you re-cut the video, editing an existing subtitle file is far quicker than transcribing again.
- If you burned captions in, keep the clean master too. You cannot remove burned-in text later.
Common problems
The subtitles drift out of sync
Almost always because the video was re-cut after transcription. Timings are anchored to the original file. Re-transcribe the new cut rather than trying to nudge the timings.
Segments are too long to read
A subtitle line should be readable in the time it is on screen — roughly a dozen words maximum. Split an over-long segment by editing it into two.
Accuracy is poor throughout
Try a larger model before assuming the tool is wrong. If large-v3 is also poor, the problem is in the audio: overlapping speakers, heavy accent plus background music, or a very low bitrate source.
The wrong language was detected
Usually caused by a long musical intro or silence before the speech starts. Trim the front of the file and transcribe again.
Subtitle your videos on your own machine
TranscribeKit transcribes, edits, translates, exports and burns in — all locally on Windows, with no account or upload.
Get it from the Microsoft Store